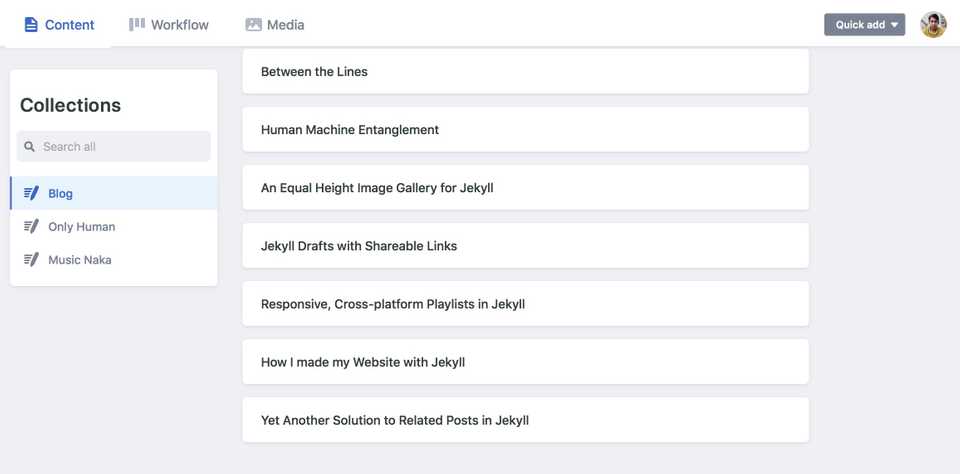
I built this website using Jekyll. Whenever I needed to write a new post, I would fire up my editor (these days, I am using Atom), and start editing a new Markdown document. I would save it as a public draft which I can review from anywhere via a browser, and then publish it when I felt it was good to go. This has worked reasonably well, except that from time to time I have felt the need for an editing environment which was less hard core!
Of course, I could just blog at Medium or use WordPress, or use a headless CMS like Contentful. Or I could add an in-browser CMS wrapper on top of my code and content repository, like Netlify CMS. According to Netlify:
Netlify CMS is an open-source React app that acts as a wrapper for the Git workflow
So basically, Netlify CMS wraps your Git workflow and provides a nice in-browser editing environment. This sounded like just the thing that would work for me. So I decided to give it a go, following the excellent documentation on how to add Netlify CMS to an existing site.
Basic configuration
For a Jekyll site, Netlify CMS requires a folder named admin at the root of the site with the following files.
aravind-website
└─ admin
    ├─ index.html    # To host the Netlify CMS React application
    └─ config.yml    # To specify Git and Jekyll parameters
The index.html in the admin folder runs the Netlify CMS application, when a user loads the site URL appended with /admin/ (e.g., my CMS application is located at https://www.aravindiyer.com/admin/). I just used the sample index.html provided by Netlify which loads the necessary CSS and JavaScript to run Netlify CMS from a CDN.
Add GitHub as a backend
For the configuration file config.yml, there are a number of settings to be entered. Since my code and content repository is hosted on Github, I wanted to set up GitHub as the backend. I just added the following lines to config.yml.
backend:
  name: github
  repo: <owner-name>/<repo-name>    # Path to your Github repository
This instructs the Netlify CMS application to look for your repository at Github to use as the backend for the CMS, and allows CMS users to use their GitHub credentials to log in to Netlify CMS. To enable GitHub login and access to your repository, you need to setup GitHub as an authentication provider for Netlify. This involves registering a new OAuth application via GitHub settings and then provisioning the Client ID and Client secret that GitHub generates into your Netlify Dashboard at Settings > Access Control > OAuth > Authentication Providers.
Configure your Workflow, Media and Collections
With the backend set up, you need to configure your editing workflow, media assets and blog post collections. By default, a new entry created via Netlify CMS gets directly committed into the main branch of your repository. This may not be ideal if you want posts to live in a draft stage and go through some review before publication. But if you use GitHub, then you have the option of turning on an editorial workflow which allows you
- to save/edit drafts (by a new branch and pull request, behind the scenes), and
- to approve/publish them (by merging the pull request and deleting the branch).
To enable the editorial workflow, I added the first line to config.yml as shown. The second line configures the path where media files are stored so that Netlify CMS can provide a dialog to pick and insert media into markdown files.
publish_mode: editorial_workflow    # Add these lines without any indentation
media_folder: "assets/images"       # Path where media files will be stored
To configure my Blog collection, I first added the following to config.yml
collections:
  - name: "blog"      # Used in routes, e.g., /admin/collections/blog
    label: "Blog"     # Used in the UI
    folder: "_posts"  # The path to the folder where the documents are stored
    create: true      # Allow users to create new documents in this collection
    slug: "{% raw %}{{year}}-{{month}}-{{day}}-{{slug}}{% endraw %}" # Filename template, e.g., YYYY-MM-DD-title.md
    extension: "markdown" # Add this is you use a file extension other than .md
This instructs Netlify CMS to create/serve files ending in .markdown named as specified by the slug in the folder _posts. I added a similar configuration for my other two collections, viz., Music Naka and Only Human.
To enable entering front matter information correctly in new blog posts, I added the following lines to config.yml. Again, I also added similar lines to configure the front matter fields of my other collections.
collections:
  - name: "blog"
...
    fields: # The front matter fields for each document
      - {label: "Title", name: "title", widget: "string"}
      - {label: "Author", name: "author", widget: "string"}
      - {label: "Publish Date", name: "date", widget: "datetime"}
      - {label: "Categories", name: "categories", widget: "string"}
      - label: "Header Image" # Use this format to specify fields with nested fields
        name: "header"
        widget: "object" # An "object" widget is a container for widgets for nested fields
        fields:
          - {label: "Teaser Image", name: "teaser", widget: "image"}
          - {label: "Detailed Image", name: "image", widget: "image", required: false}
          - {label: "Alternative Text", name: "alt", widget: "text", required: false}
      - {label: "Excerpt", name: "excerpt", widget: "text"} # Custom excerpt
      - {label: "Description", name: "description", widget: "text"} # Open Graph description
      - {label: "Featured Image", name: "og_image", widget: "image"} # Open Graph image
      - {label: "Body", name: "body", widget: "markdown"} # Mandatory body field for markdown files
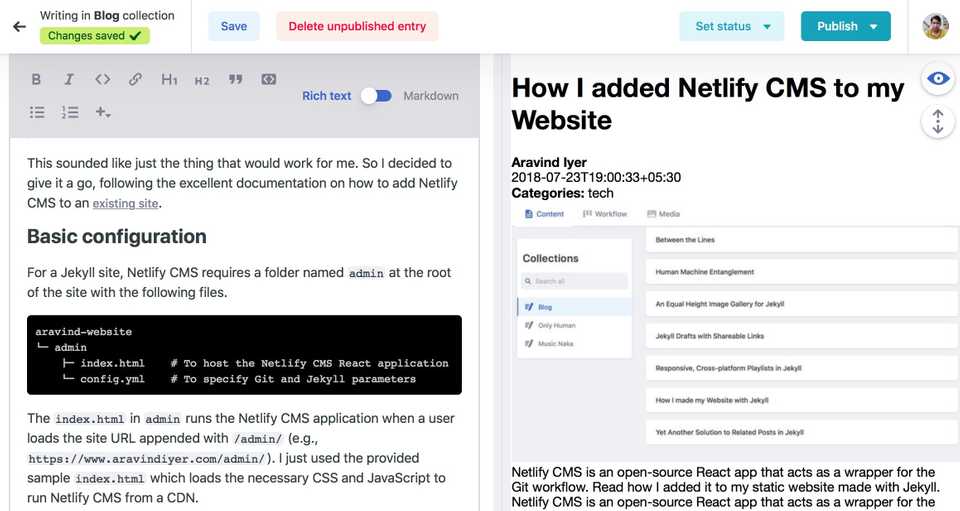
And voila! I am actually editing this post in Netlify CMS!
So that’s how I added Netlify CMS to my website. I hope you found it useful. I also hope this shiny new UI inspires me to post more often, rather than goad me to do more development!

